Streaming Audio for Participants via Google Meet
Completion requirements
REQUIREMENTS
- Google Chrome Browser
- Google for Education Account
- A Google Meet Event that is scheduled via Google Calendar
STEP 1: LOG IN TO CHROME BROWSER
A. VERIFY BROWSER LOGIN STATUS
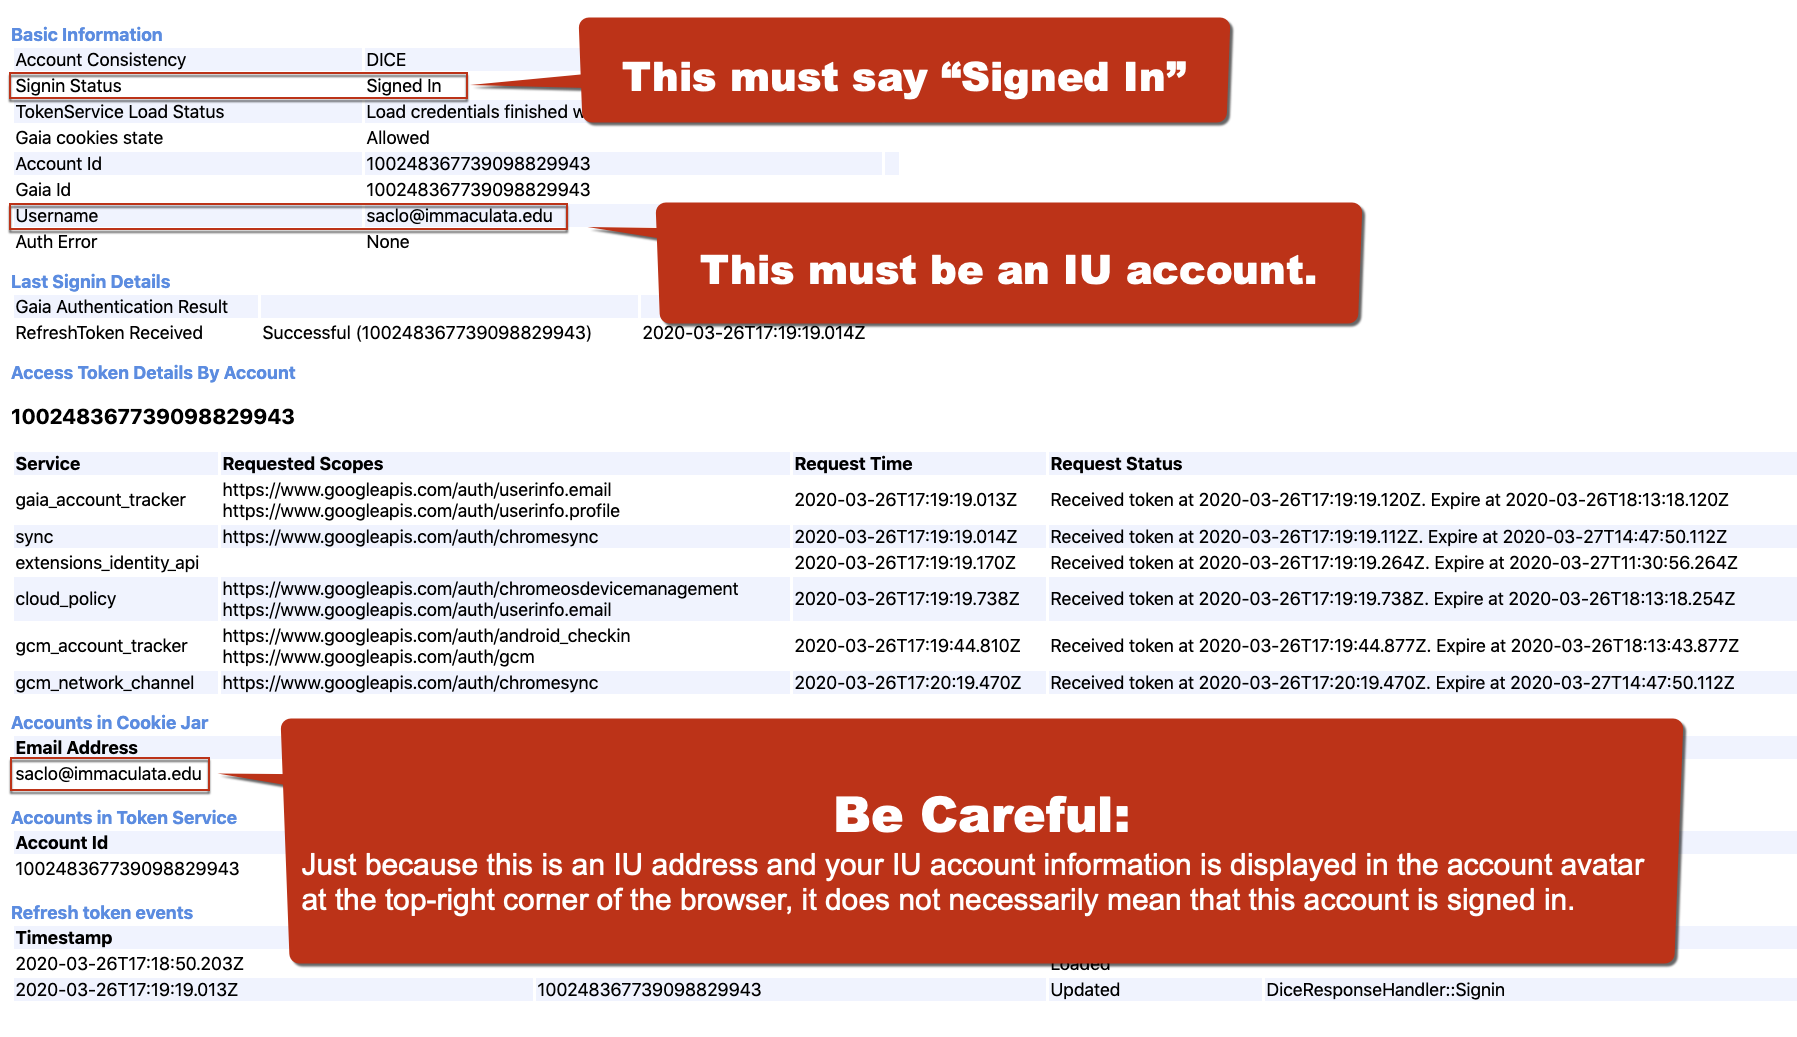
- Visit: chrome://signin-internals/
- Confirm that you are signed in using an IU account
- Note:
- Logging into the browser is not the same as logging into a session.
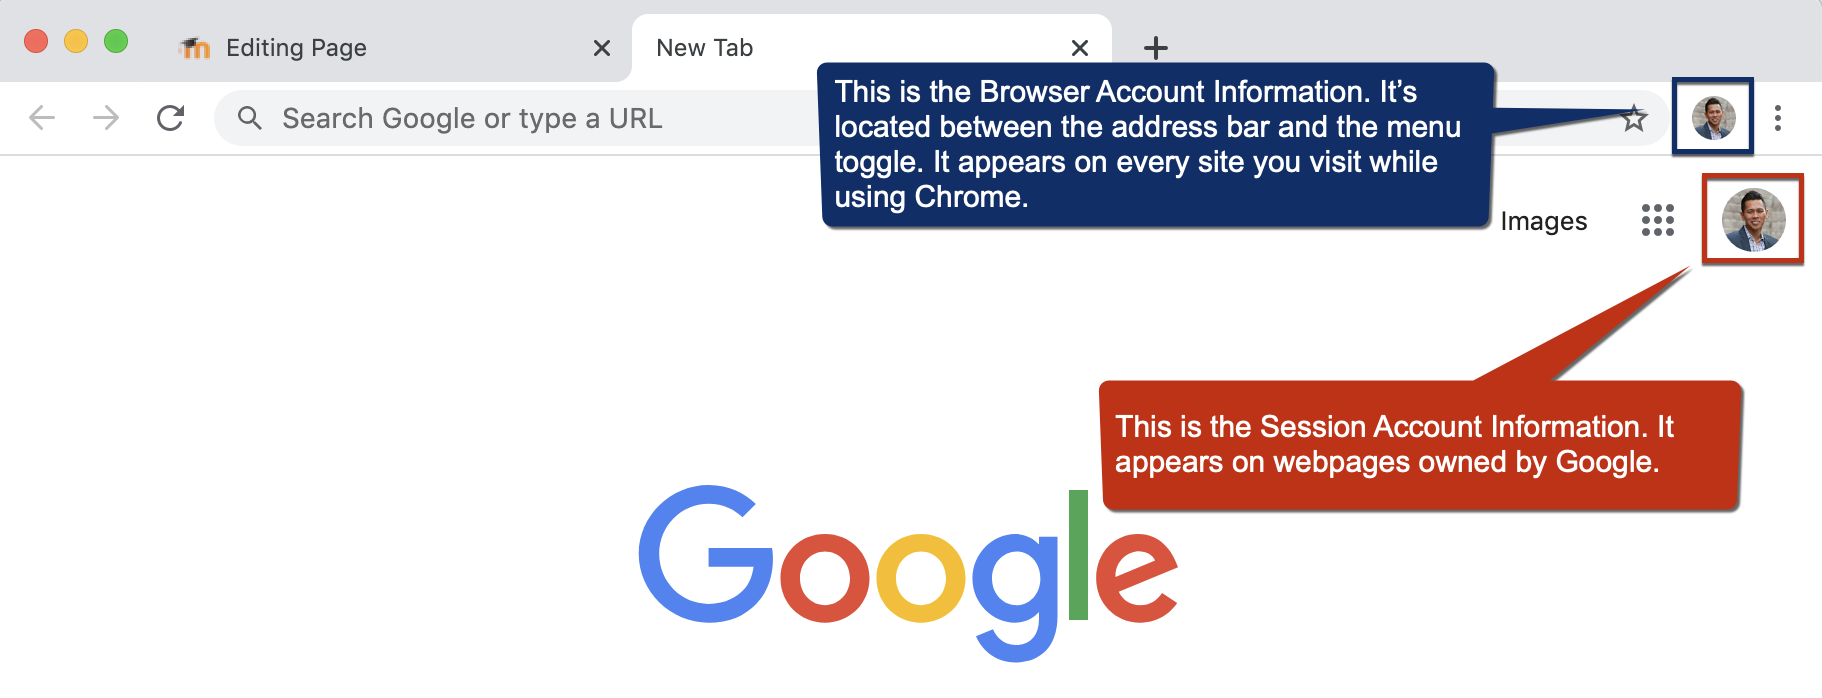
- You will need to be logged in to the Chrome Browser using your IU Google Account for this to work. However, it is sometimes deceiving because it might show your IU Account information via the Google Avatar, but the log in status might not technically be logged in.
Click the Image to Enlarge.
Click the Image to Enlarge.
- If you are properly logged in to Chrome, skip part B.
B. LOG IN TO CHROME
- 1 - Left-click on the avatar immediately beside the menu toggle (the icon with three vertical dots).
- 2 - On the menu that appears, click Add Account.
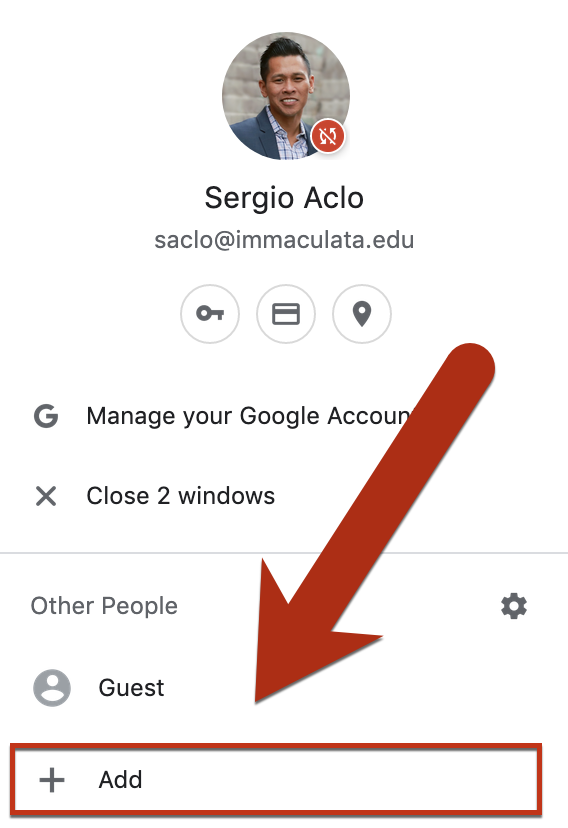
- Note:
- If chrome://signin-internals/ says you are not logged in, then you will need to add you IU account even if you see it at the top of this menu.
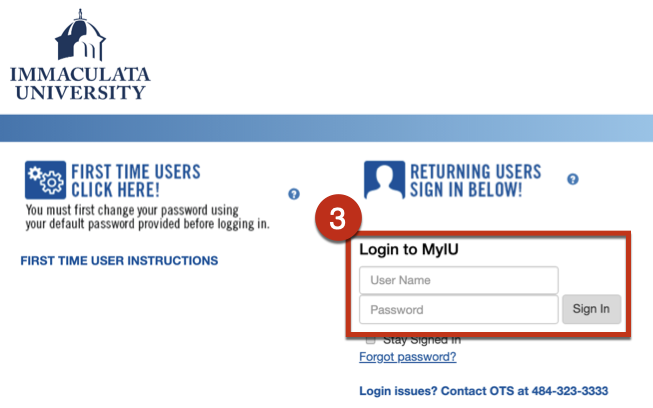
- 3 - On the next page, click Add Person

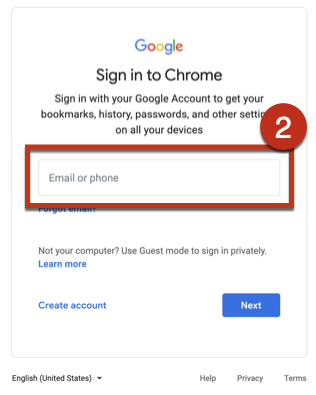
- 4 - Enter your email address and click Add.

- 5 - Complete the Sign In process. If it gives you an option to Switch after you have signed in, be sure to do so.


STEP 3: CONFIGURE CHROME
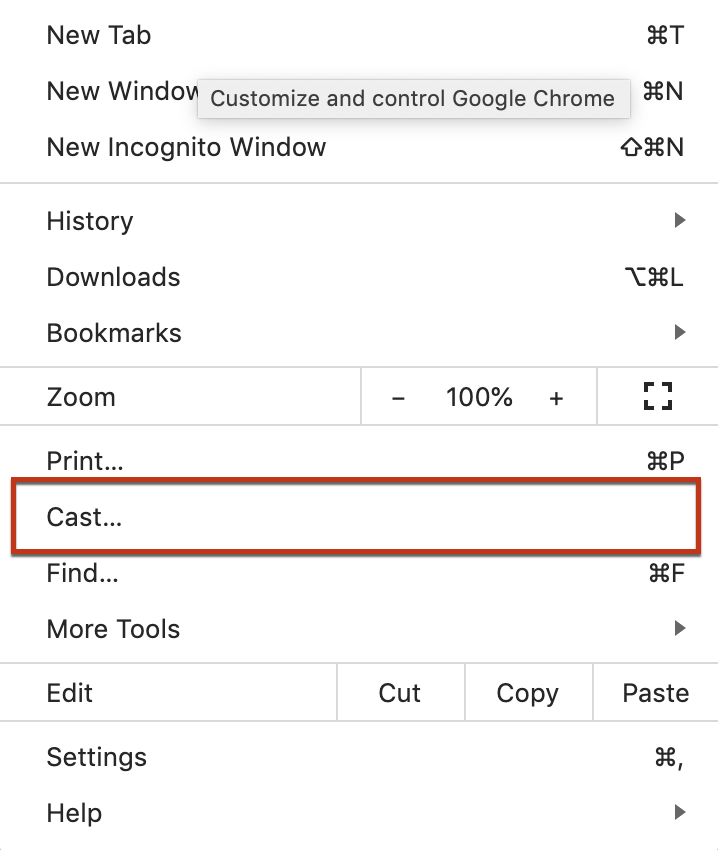
- Click on the menu button

- On the menu window, select Cast.
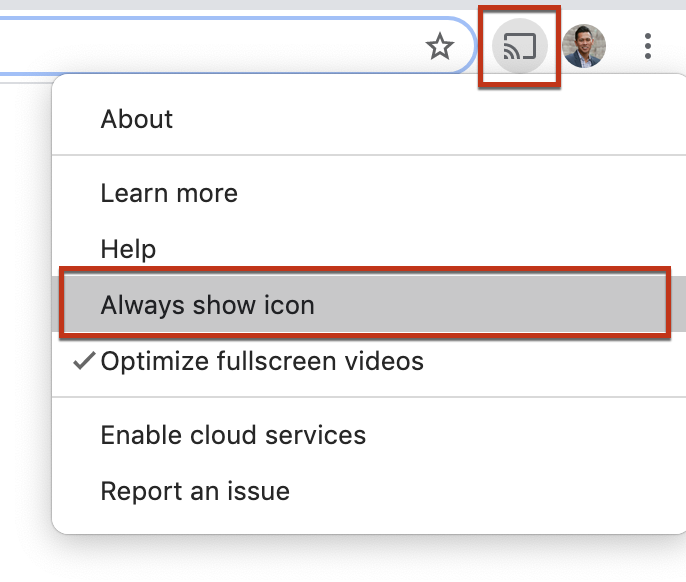
- This will add a new icon next to your avatar. Right-click this icon and select Always show icon. Otherwise, this icon and the corresponding menu will continue to disappear from the task bar.
- Once the icon persists on the task bar, right-click it again. This time, select Enable cloud services.
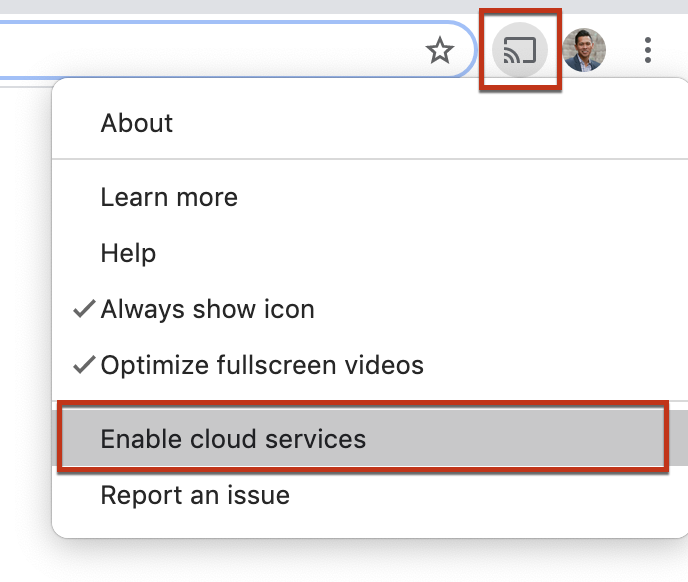
You now have the ability to cast both audio and video to devices and cloud services, such as Google Meet. However, the only Meet sessions that will appear here are those that are scheduled in your Google Calendar. So let's go ahead and schedule something.
STEP 4: SCHEDULE GOOGLE MEET SESSIONS VIA GOOGLE CALENDAR
- Create a new calendar event from the Google Calendar website. For quicker access, visit the following URL: https://calendar.google.com/calendar/a/immaculata.edu/r/eventedit
- Add a Title
- Schedule a time.
- NOTE: If you will need to cast audio/video regularly, schedule your meeting so that it repeats regularly for your class meeting times. However, you will have to direct them to go to the Meet URL (same each time) instead of entering the
code. You may also add all of your students as guest. This way, when they visit Google Meet, they will immediately see your class in the list of scheduled meetings -- no codes necessary.
- Add Conferencing
- OPTIONAL - Add Guests
- If you want your participants to be able to cast audio, then they MUST be invited as guests, in addition to performing all of the above steps.
STEP 5: DURING YOUR GOOGLE MEET SESSION
When you visit the Google Meet URL that you scheduled in your calendar, and you do so during the scheduled time, then you may CAST to that Google Meet room when you click on the cast icon we configured earlier.
When you click on your Google Meet session, you will immediately be casting to everyone in that room.
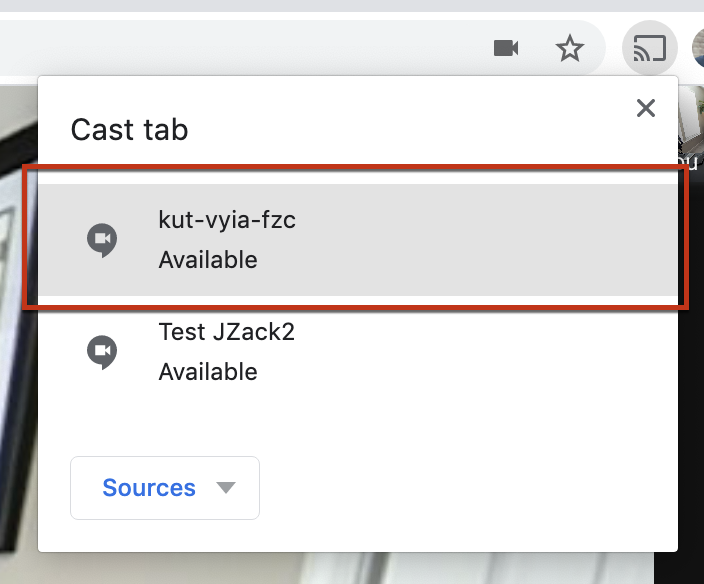
When you click on your Google Meet session, you will immediately be casting to everyone in that room.
- To open media on the web (e.g., YouTube, navigate to the site that contains the media you wish to show, then while on that tab, click the cast icon and select your Google Meet room.
- To open media on your local machine, you will need to open the media you wish to play (e.g., an MP4 video) from Google Chrome rather than the standard application.
- From your Google Chrome browser, navigate to FILE >> OPEN.
- Select the file you wish to cast.
- When that file opens in a new Google Tab, click on the cast icon on that tab and select your Google Meet room.
- Everyone in that Google Meet session may now see and hear your media file.
Last modified: Thursday, 26 March 2020, 3:53 PM